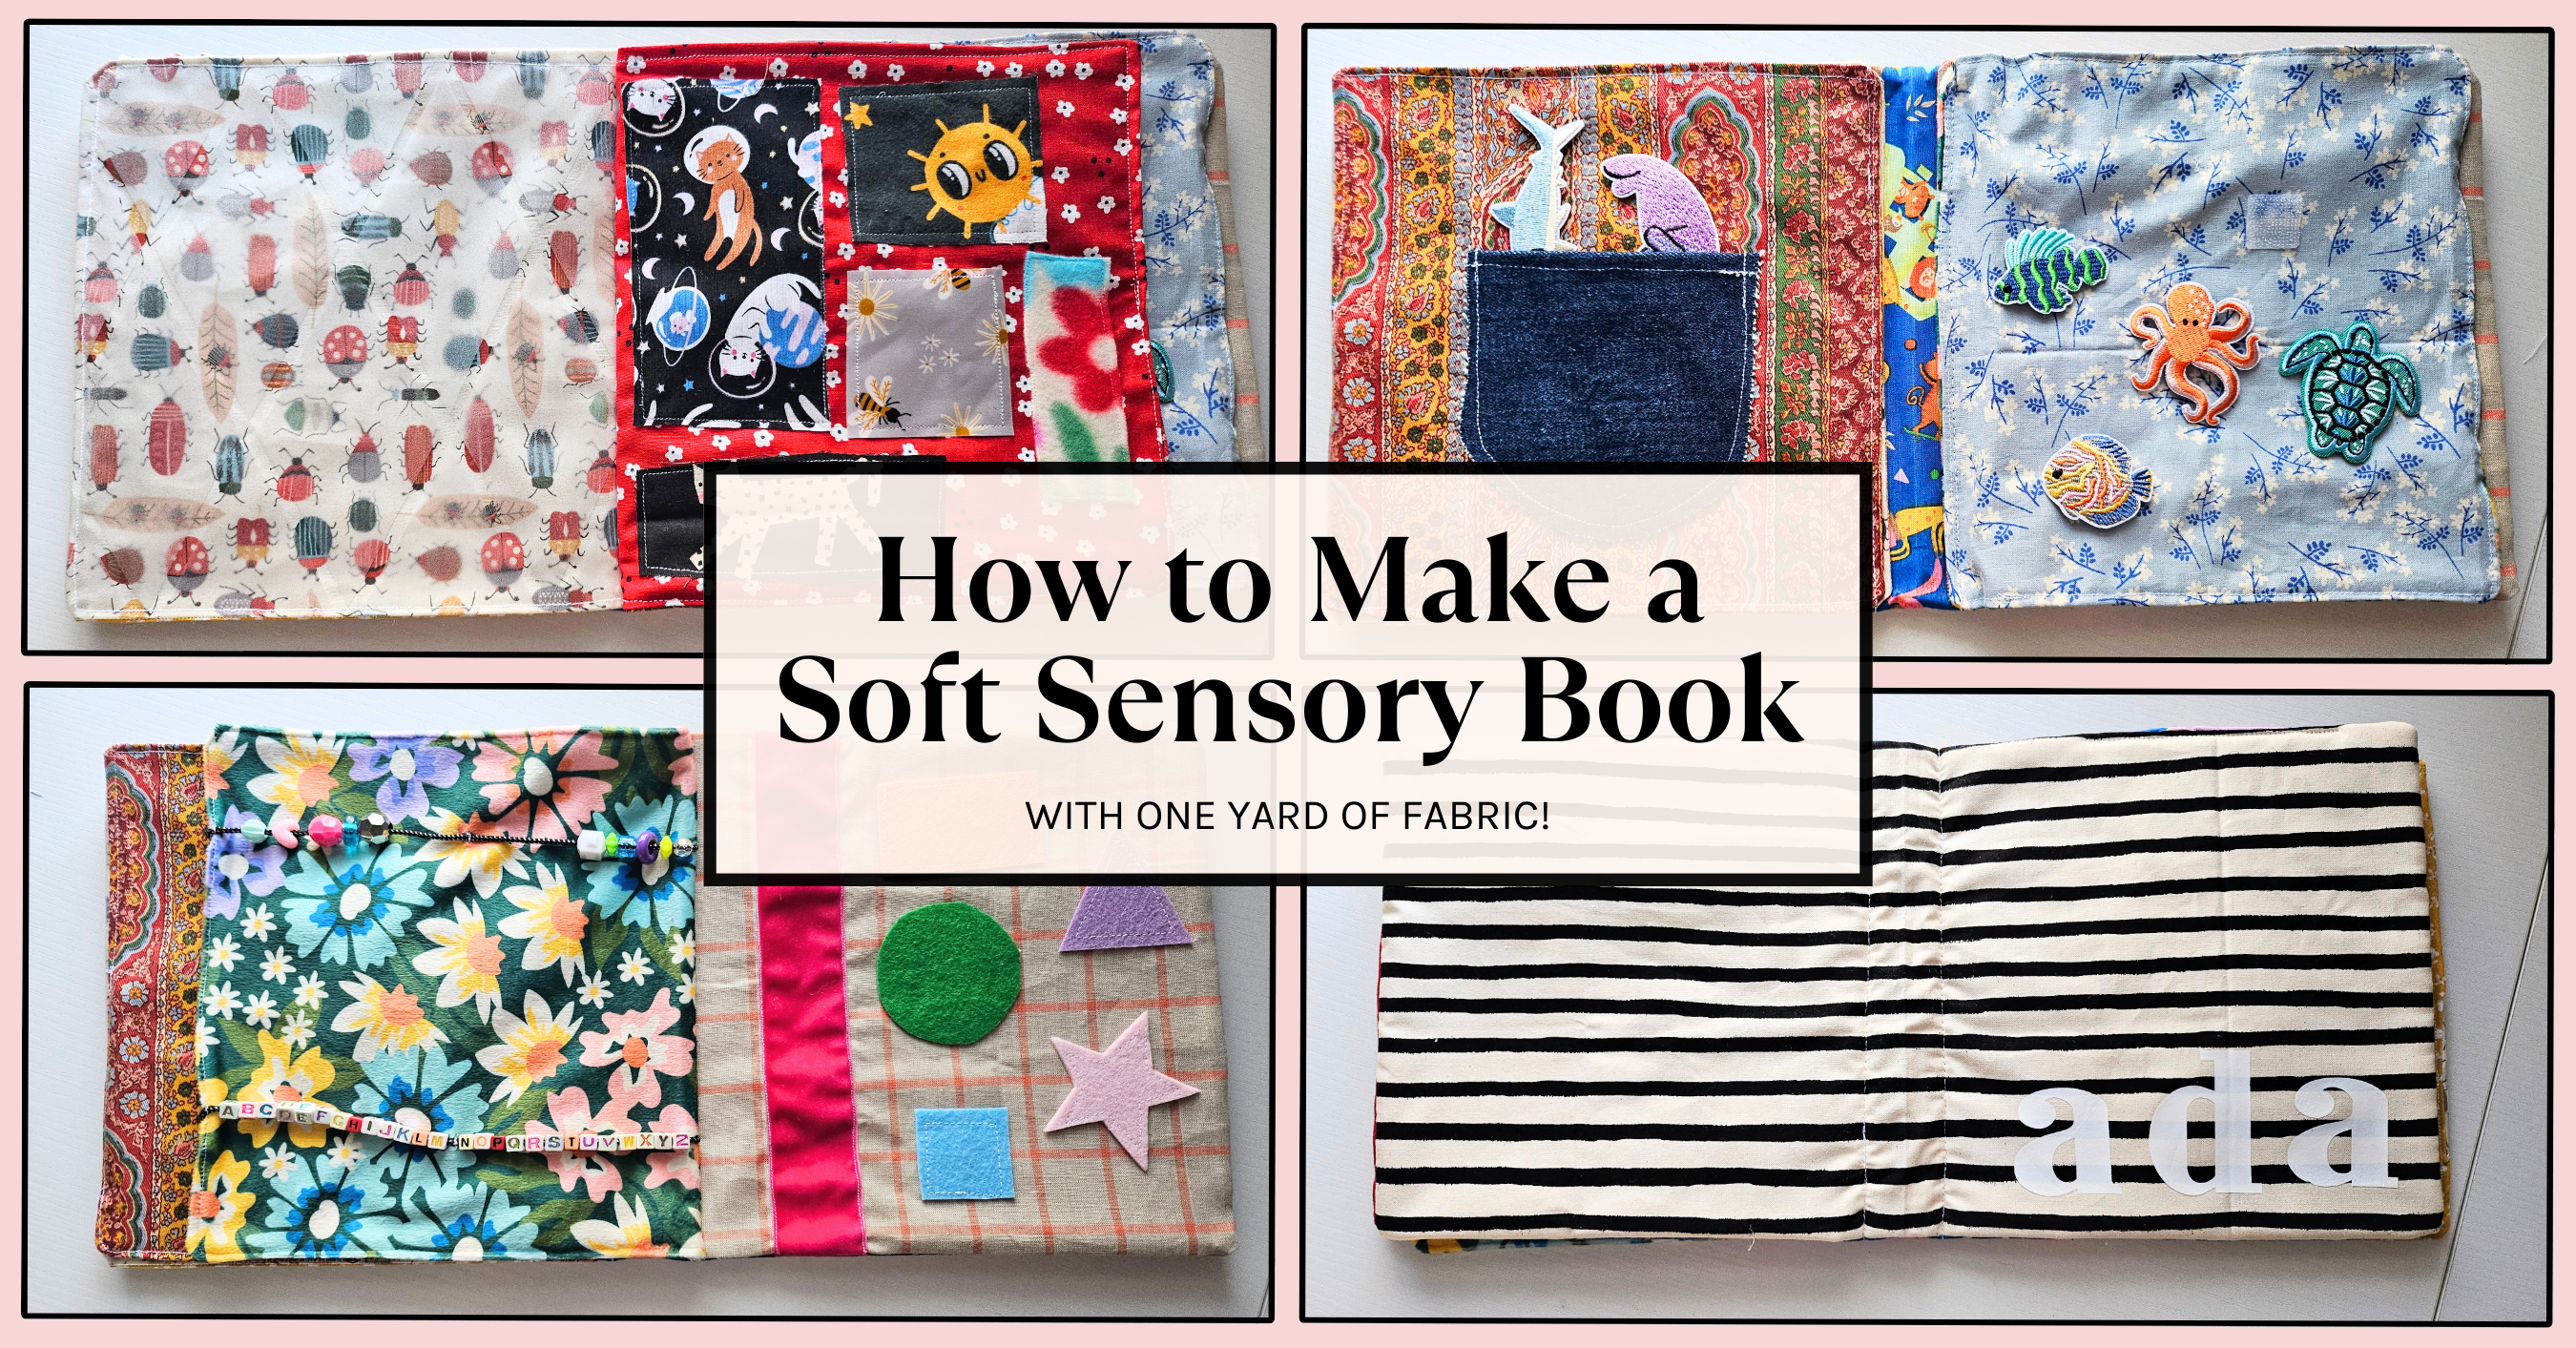
My baby is absolutely obsessed with books and sensory toys, so I thought I’d make her a custom soft sensory book! I made sure to include some of her favorite things like sea animals, fuzzy textures, a crinkly page, and a pocket she could use to store little toys. This project is great for using up scraps and you could make this whole project with just a yard of fabric and a handful of random pieces you have lying around in your crafting space. If you’ve wanted to make a custom soft book for your favorite little one, keep reading for a full tutorial!
Cut out your fabric
For the cover, I cut out one piece of outer fabric, one piece of inner fabric, and a piece of cotton batting. Each piece is 18″ x 9″. Then I cut out 8 pieces of fabric for the pages that were 9″ x 9″ to make four sets (four total pages).
However, if you plan to make your pages 9″ x 9″, you should cut your cover pieces to 19″ x 9.5″ to take into consideration that space you’ll need for the “spine.” I didn’t realize this until the very end so my pages slightly peek out of the edges of the cover. Not a big deal but if I made this again, I would make the cover slightly larger.
Also, if you want the pages to be a little more stiff and less floppy, you could also use fusible interfacing inside each page, but I chose not to. You can also add wax paper or a plastic sheet to make the pages crinkly (highly recommend!).


I then decided which pieces of fabric I wanted to go together to make each page. I tried to use a variety of patterns, colors, and textures to make the pages more interesting!
Creating the pages
Here I’ll go into detail on how I made some of the more intricate pages, but this project is so customizable that once you have the basics of assembly down, you can design anything you like!
Yarn Page
For the yarn page, I cut a bunch of pieces of yarn and tied knots on one end so they wouldn’t fray. Then I used some tape to hold the yarn in place so I could stitch it down very close to the top edge of my fabric.
When joining this page to its backing piece, face the pieces right sides together and stitch around all sides, leaving a 2″ gap to turn the page right side out. Top stitch all the way around the page to close the opening and to secure the yarn to its side of the page.


I later ironed on a tractor patch underneath the yarn just for a little extra fun.
Bead Page
Take a long and sturdy string or bracelet cord and string on your beads. It’s helpful to tie a knot on the ends to make sure the beads don’t fall off while you’re sewing. Using a zigzag stitch with a stitch length of 1 and a width of 2, secure the string to the edges of the fabric. I went pretty overboard here to make sure it really held on tightly.
When you secure the bead piece to its backing piece, place the pieces right sides together and stitch all the way around, leaving a 2″ gap to turn the page right side out. Go back and forth over the strings a few times to make sure they’re very secure and the beads don’t come off. Trim off the excess string before turning the page right side out.


Felt Shapes Page
For this page, I just cut out some felt shapes and stitched them onto the fabric to secure them. I also added a velvet ribbon for an extra sensory element.


Velcro Page
For this page, I used my hot glue gun to glue down some velcro squares onto the fabric. Then, I glued the opposing velcro onto the animal patches. I was very liberal with the glue so that the velcro would hold up to strong baby hands. This was maybe the easiest page to make!


Additional Pages
These next pages were simple, straightforward and highly customizable. If you want walk-thrus on any of these pages, let me know!


Make the cover
Since I wanted the striped fabric to be the outer cover, I layered the pieces like this: batting, stripes (right side up), and animal pattern (right side down).
Stitch all the way around the edges with a 1/2″ seam allowance, leaving a 3″ gap to turn it right side out. Before turning, trim the excess seam allowance and clip the corners. Turn the cover right side out and then top stitch the opening closed. Press the cover with an iron to smooth out the edges.


Attaching the pages to the cover
On the inside of the cover, mark a faint line down the center with a fabric pencil. Figure out the order you want your pages to go, putting two on one side and two on the other. Once you have your layout decided, sew the two left side pages ~1/2″ to the left of the center line you drew. Repeat for the pages on the right side. Backstitch heavily on the ends to secure the pages to the cover. Now you’re done!


Final Reveal


Things I want to change for next time:
- Add a loop to the cover for carrying or hooking on to a stroller
- Add ribbons along the edges of the cover (like a tag toy)
- Make a clear page with thick vinyl and put buttons and glitter inside
- Use more variety in fabric textures for the pages
- Add even more yarn to the yarn page to make it more interesting
As a finishing touch, I ironed on her name to the front which is just the cutest. I’m so happy with how this book turned out and Baby A already loves it so much. Her favorite pages are the velcro sea creatures and the little pocket that she stuffs all them into over and over again. If you make this, let me know; I’d love to see it!
