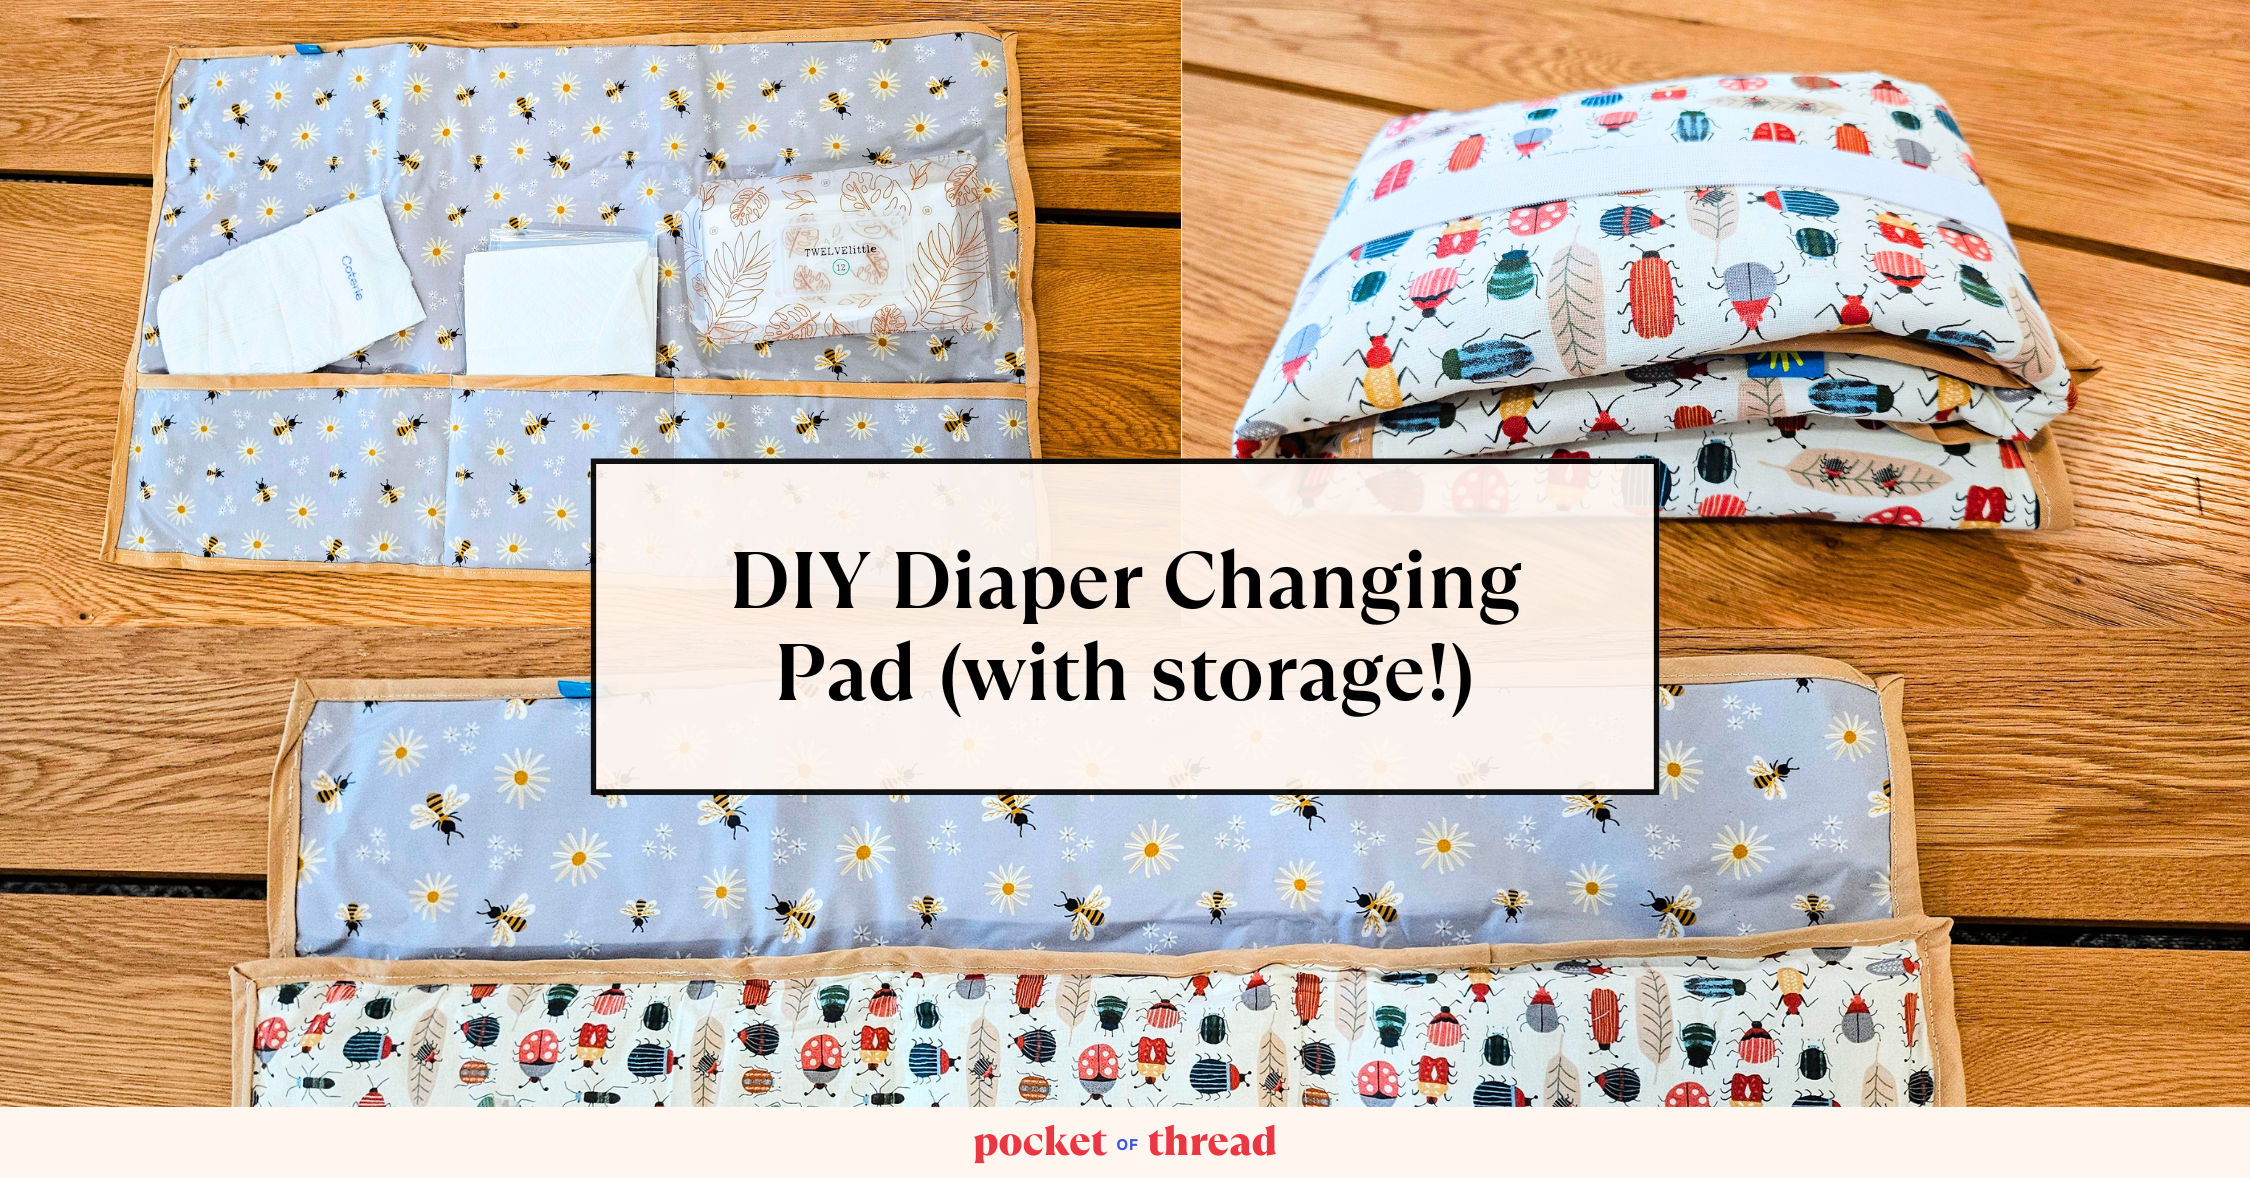
When my husband asked me to make a custom diaper changing pad, I thought, “no problem!” Then he told me he wanted it to fit in a tiny 2L sling bag and I was less confident. Despite several setbacks, challenges, and constraints, I made a custom diaper changing pad that not only fits into his bag, but also holds wipes, diapers, pee pads, and baggies! Check out the full tutorial in the post!
Prep and Planning
Materials:
- Cotton batting
- 1/2 yard of oilcloth (it’s waterproof and easy to wipe down)
- 1/2 yard of backing fabric (can be cotton, denim, canvas, or another sturdy fabric)
- Thread
- Coordinating bias tape (I used ~1.25 packs)
- 12″ of 1″ elastic
Today’s sewing project comes from a hyper-specific request from my husband, Hunter: make a diaper changing pad that can fit in this exact sling bag so he can carry as few things as possible when he’s out with Baby A.
Here’s the bag:


It’s a narrow, 2L bag that it wider at the base than at the top. At first I though this would be a piece of cake, but then as I started sketching out ideas and taking measurements, I realized this was going to be more of a challenge than I anticipated.

His hard requirements were:
- Must fit in the sling bag
- Must be able to fit at least one diaper, a ziplock bag, a pee pad, and wipes
- Must be at least slightly padded for comfort
Initially I thought I could fit in a change of clothes and hand sanitizer too, but that proved to be optimistic, so that’s going to be for a V2 later down the road.
As you can tell from the sketches above, I entertained a variety of designs and pocket placements to hold all of the various diaper accoutrement. But in the end, this is the design I ultimately decided to go with:

In this design I added a pocket that would go full-length across the bottom third of the pad. I would divide the pocket into three parts to fit everything and it would all roll up nicely into a little burrito that I would secure closed with the velcro strap. Simple!
I even made a rough prototype out of some scrap cotton fabric to validate my measurements and the overall design.

By now I was feeling pretty confident in the design and decided to just go for it with my actual fabric. I cut out:
- 2 pieces of cotton in 29″ x 18″ (the max I found I could fit into the sling bag)
- 2 pieces of batting in 29″ x 18″
- 2 pieces of oilcloth in 29″ x 18″
- 2 pieces of oilcloth in 6″ x 29″ (for the pocket)
I also had some slick-on velcro, webbing, and bias tape.

Making the Pocket
I started by making the pocket. With wrong sides together, I basted the short ends of the pocket pieces together to hold them closed while I attached the bias tape. This will make it easier to sew onto the main pad later too. Then, I opened up the bias tape with right sides together and clipped it to the top edge of my pocket. I stitched inside the crease closest to the edge.


Then, fold the bias tape over to the other side of your fabric with raw edges folded in and sew as close to the edge of the bias tape as possible.


The pocket is complete!
Assembling the Pad
This part is essentially the same as making a whole-cloth quilt: sandwich your fabric with the batting and finish the edges with bias tape. I also recommend pinning the three layers together throughout the center of the fabric too to prevent them from sliding around as you sew.

Baste along all four edges as close as possible to the edge while still catching each layer. For me this was ~1/8″.
Now here was where things started to go off the rails for me. I had never sewn with oilcloth before and did not realize how much my machine was going to hate it. My tension was never quite right and with a standard presser foot, my machine was really struggling to move the fabric through the feed dogs. While I experimented with getting the right tension and how to best guide the fabric through the machine, I ended up with some pretty sloppy stitches and nests on the underneath of my fabric that I had to go back over. It wasn’t a pretty sight so thank god I’ll be covering it up with bias tape!
Next up, I attempted to sew some quilting stitches along the pad (like in my sketch), but for the same reasons I just mentioned, this was simply not happening. I even swapped my standard foot for a rolling foot, which helped a little, but still didn’t give me clean enough stitches for visible quilting lines like I wanted.
After several attempts and many seamripper sessions later, I just decided that this pad didn’t need quilting and that it was time to move on. Oh well, I tried.
Attach the Pocket
I laid my pocket on top of the oilcloth side of my pad and basted the short edges down to the pad, ~1/8″ from the edge. Next, I laid out the items that need to go into each pocket section out so I could mark where the dividers would need to go.

I marked where I wanted the pockets to be and stitched along those lines, making sure to back stitch a lot over the top edge of the pocket to secure it in place. You don’t want the items to fit too snugly since they have volume and will need a little extra space.

Attach the Bias Tape
Now, just like with the pocket, you’re going to sew the bias tape all around the perimeter of the pad. You can see more photos of how I do this in my baby blanket tutorial. I also added a cute little tag that just peeks out.


At this point, the pad can be used and it’s essentially done. However, in order for this thing to fit in the sling bag, I knew I would need some kind of closure that could really compress it down. Since I already had some stick-on velcro, I figured I would just use that. It’s simple and should work great, right? Wrong. Very wrong.
Figuring Out The Closure
I folded up my changing pad as tightly as I could and marked where I wanted the strap to be placed and then stitched it down after melting the raw edge with a lighter to prevent fraying. Then, I placed my velcro stickers down where I wanted them to go and stuck their counterparts onto the bag so that the strap would line up nicely. This part all went wonderfully, until…


The adhesive on the velcro stickers was absolutely not strong enough to be a permanent solution and I knew I would have to sew the pieces down. Here is where, once again, I ran into trouble. The adhesive was so sticky that it it gummed up my needle and prevented it from sewing smoothly. I had rat’s nests of thread all over the place and I tried a variety of tricks to get things working, but I my machine was just over it at this point and I knew I would need to pivot to another idea. I should mention that I feel like I would not have had this problem if I used non-sticky velcro, I just didn’t have any and wasn’t about to go out and buy some.
What I did have though was elastic which I knew would compress the pad down nicely and would be super simple to add. I pinned some in place so I could gauge how long it would need to be to fit around the pad and then cut it to length, accounting for stretch. I opened up about an inch of my bias tape and stuffed the ends of the elastic inside and stitched it very securely.


Look at how nice and compact that is!!
Even though this wasn’t the vision I had in the beginning, I’m pretty proud of myself for figuring out a different solution. Sometimes in life crafting you just have to learn to adapt and make changes on the fly. Ok, are you ready to see the final reveal and see if it fits in the bag?!
Final Reveal


Of course this didn’t turn out perfectly and if you look closely, you’ll see lots of imperfect stitches and corners, but honestly who cares. I’m pretty happy with how this V1 turned out and since it holds the required items AND fits inside an impossibly small bag, I’d say this project was a success! I’m already thinking about ways I can improve this for a version two:
- start with the rolling foot from the beginning to prevent thread snags
- make the pad ~.5″ smaller on each side so it fits into the bag a bit easier (I initially didn’t account for the binding or the bulk the batting added)
- Divide the pockets into perfect thirds for easier folding when closing
Of course if you don’t have to stuff your diaper pad into a sling bag, there are tons of ways you could customize this project:
- Make a little pillow for baby’s head to rest on during changes (maybe even use this to store the diapers!)
- Use a toggle button and elastic cord for a closure
- Use thicker batting for extra comfort
- Use wider bias tape for a different look
- Add a loop to attach a hand sanitizer keychain
This diaper changing pad is definitely the “first pancake” of this project, but I plan to make more for friends with babies so hopefully I can work out the kinks and give you all an update on how the V2 turns out. If you make this, let me know; I’d love to see it!
