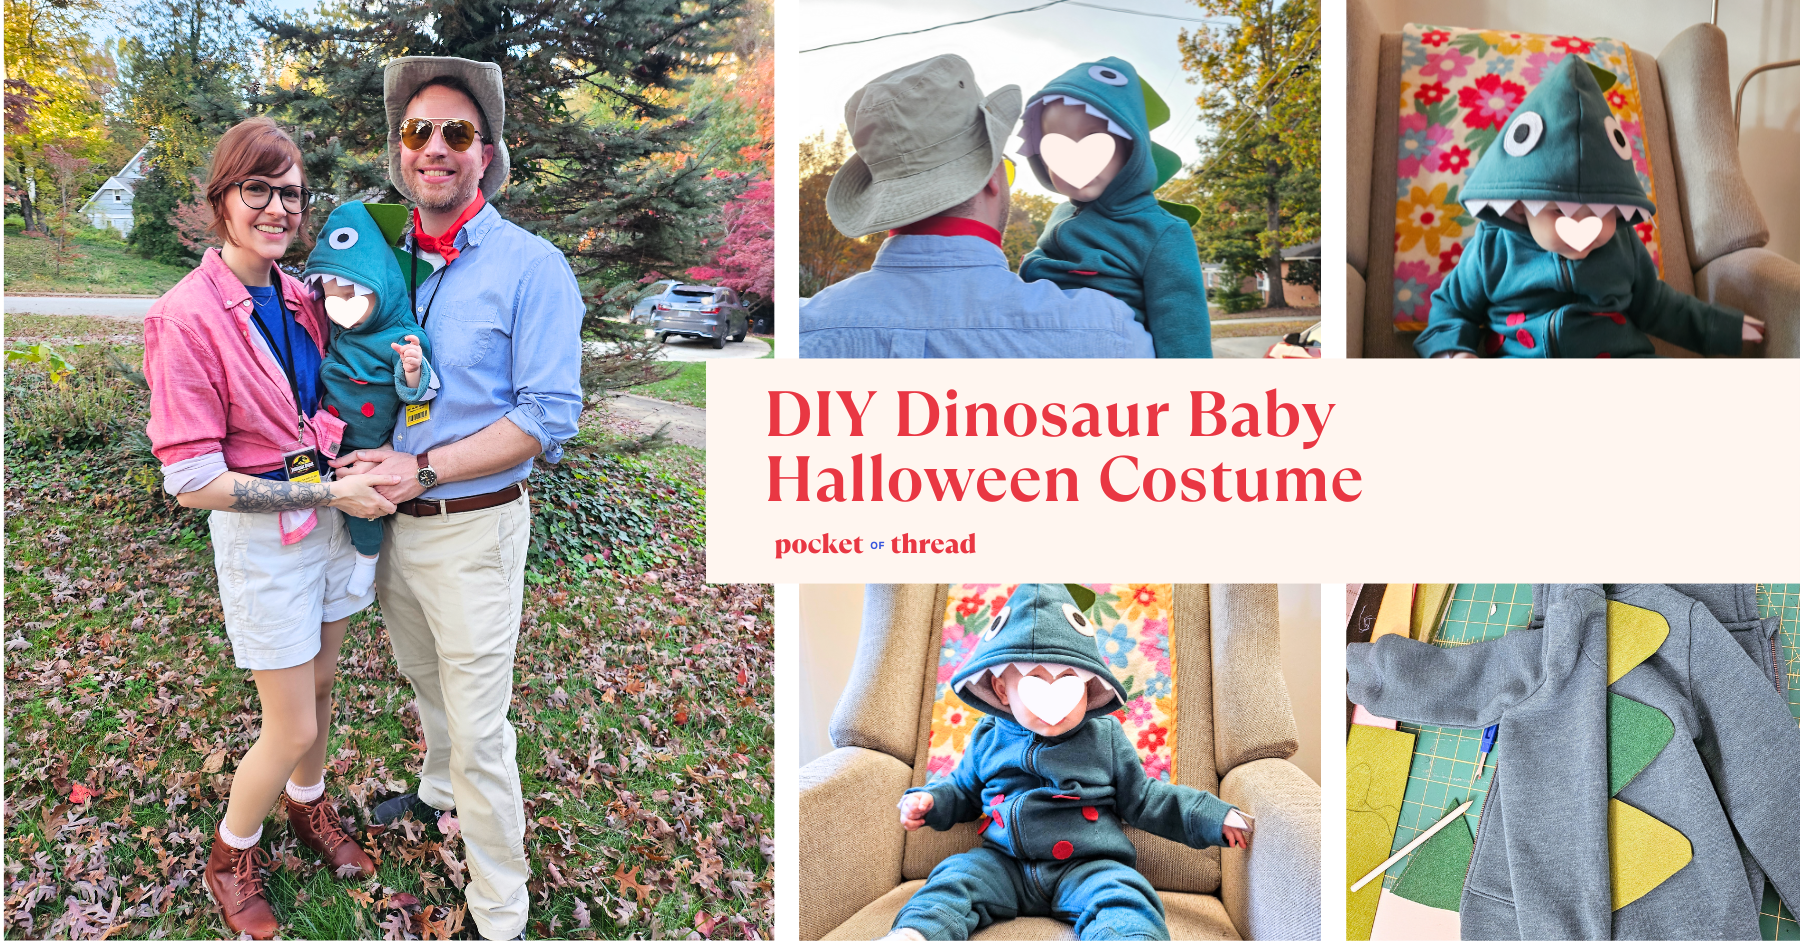
For years, I’ve wanted to do a Jurassic Park-themed family Halloween costume and this year I finally made it happen. I love DIY costumes and this year was no different so today I’m going to walk you through every step of making Baby A’s DIY baby dinosaur costume! There are lots of opportunities for customization in this tutorial so have fun with it and get creative!
Supplies:
- Costume Base
I decided to start with this hooded onesie from Primary since it looked so cozy and would keep Baby A nice and warm on Halloween night, but you could really choose whatever works best for you such as a non-hooded romper, a sweatshirt, or a hoodie you already have. Or, if you’re feeling extra crafty, make your own onesie too!
- Thick Felt
I got these packs of thick felt from Amazon and it’s more than enough for this project. I knew I wanted to use it for other projects so I got a lot, but you could also get 2-3 individual sheets from your local craft store. Choose any colors you want your dinosaur to be!
- Color-coordinated Thread to make your seams blend in
Tutorial
Sew on the teeth


I measured where I wanted the teeth to go along the hood and used a ruled to measure out each tooth spike so they’d be even. I added an inch along the bottom as the seam allowance so I could line up my stitches to the existing row of stitches on the hood for a seamless look.
Make the spikes


I made a paper template for the spikes and traced it to cut out all of the spikes I wanted to use. I liked how the alternating colors looked!
Next, I stitched the spikes together, overlapping by about a half inch, so they wouldn’t shift around when I went to sew them into the sweater.
Cut open the back

This part was a little scary but straightforward. I started by unpicking the stitching in the hood at the very top (the pointy bit) and worked my way all the way down the hood. Then, I measured and marked the center of the romper and cut down, stopping a few inches above the crotch since I didn’t want Baby A to be sitting on spikes. I actually had to remove one of the felt spikes from my chain since the opening I cut was a little smaller.
Pin and sew in the spikes


Next, sandwich the sweater and your spike chain with the points facing the right side of the fabric. Pin or clip the pieces together and sew!

Your should then have something that looks like this! We’re nearly done!
Attach the eyes and claws


I used double-sided tape to place the eyes into position and hold them there while I stitched around the perimeter. For the claws, I eyeballed the shapes and cut them out. Then I pinned them on the inside of the cuff so that my stitches would blend in with the existing stitching.
I actually ended up redoing the pupils on the eyes to make them smaller and I like them so much better now!
Add the tail
I’ll be honest, by the time I got to the tail, I was pretty tired and I kind of phoned it in. There are some great tutorials for dinosaur/dragon tails online that I definitely would have used if I hadn’t been exhausted with only two days left until Halloween.
For my version, I just stitched some felt “spikes” along a thin piece of matching felt and then folded the spikes in half and hot-glued them closed. I made these spikes about 2/3 the size of the main spikes. I left a long piece of felt at the top of the tail so I could sew it onto the onesie just underneath the main spikes.


Finishing touches


The onesie I used as a base had pockets in the front that I wasn’t in love with so I removed them and added some little red felt circles for the “belly.”
Final Reveal!


This costume was such a hit and Baby A didn’t really seem to mind the hood at all. She did not, however, seem to understand the claws and kept messing with them all night. I hope you get a little inspired from this tutorial and I’d love to see your version of a baby (or big kid!) dinosaur costume!
Happy Halloween!
