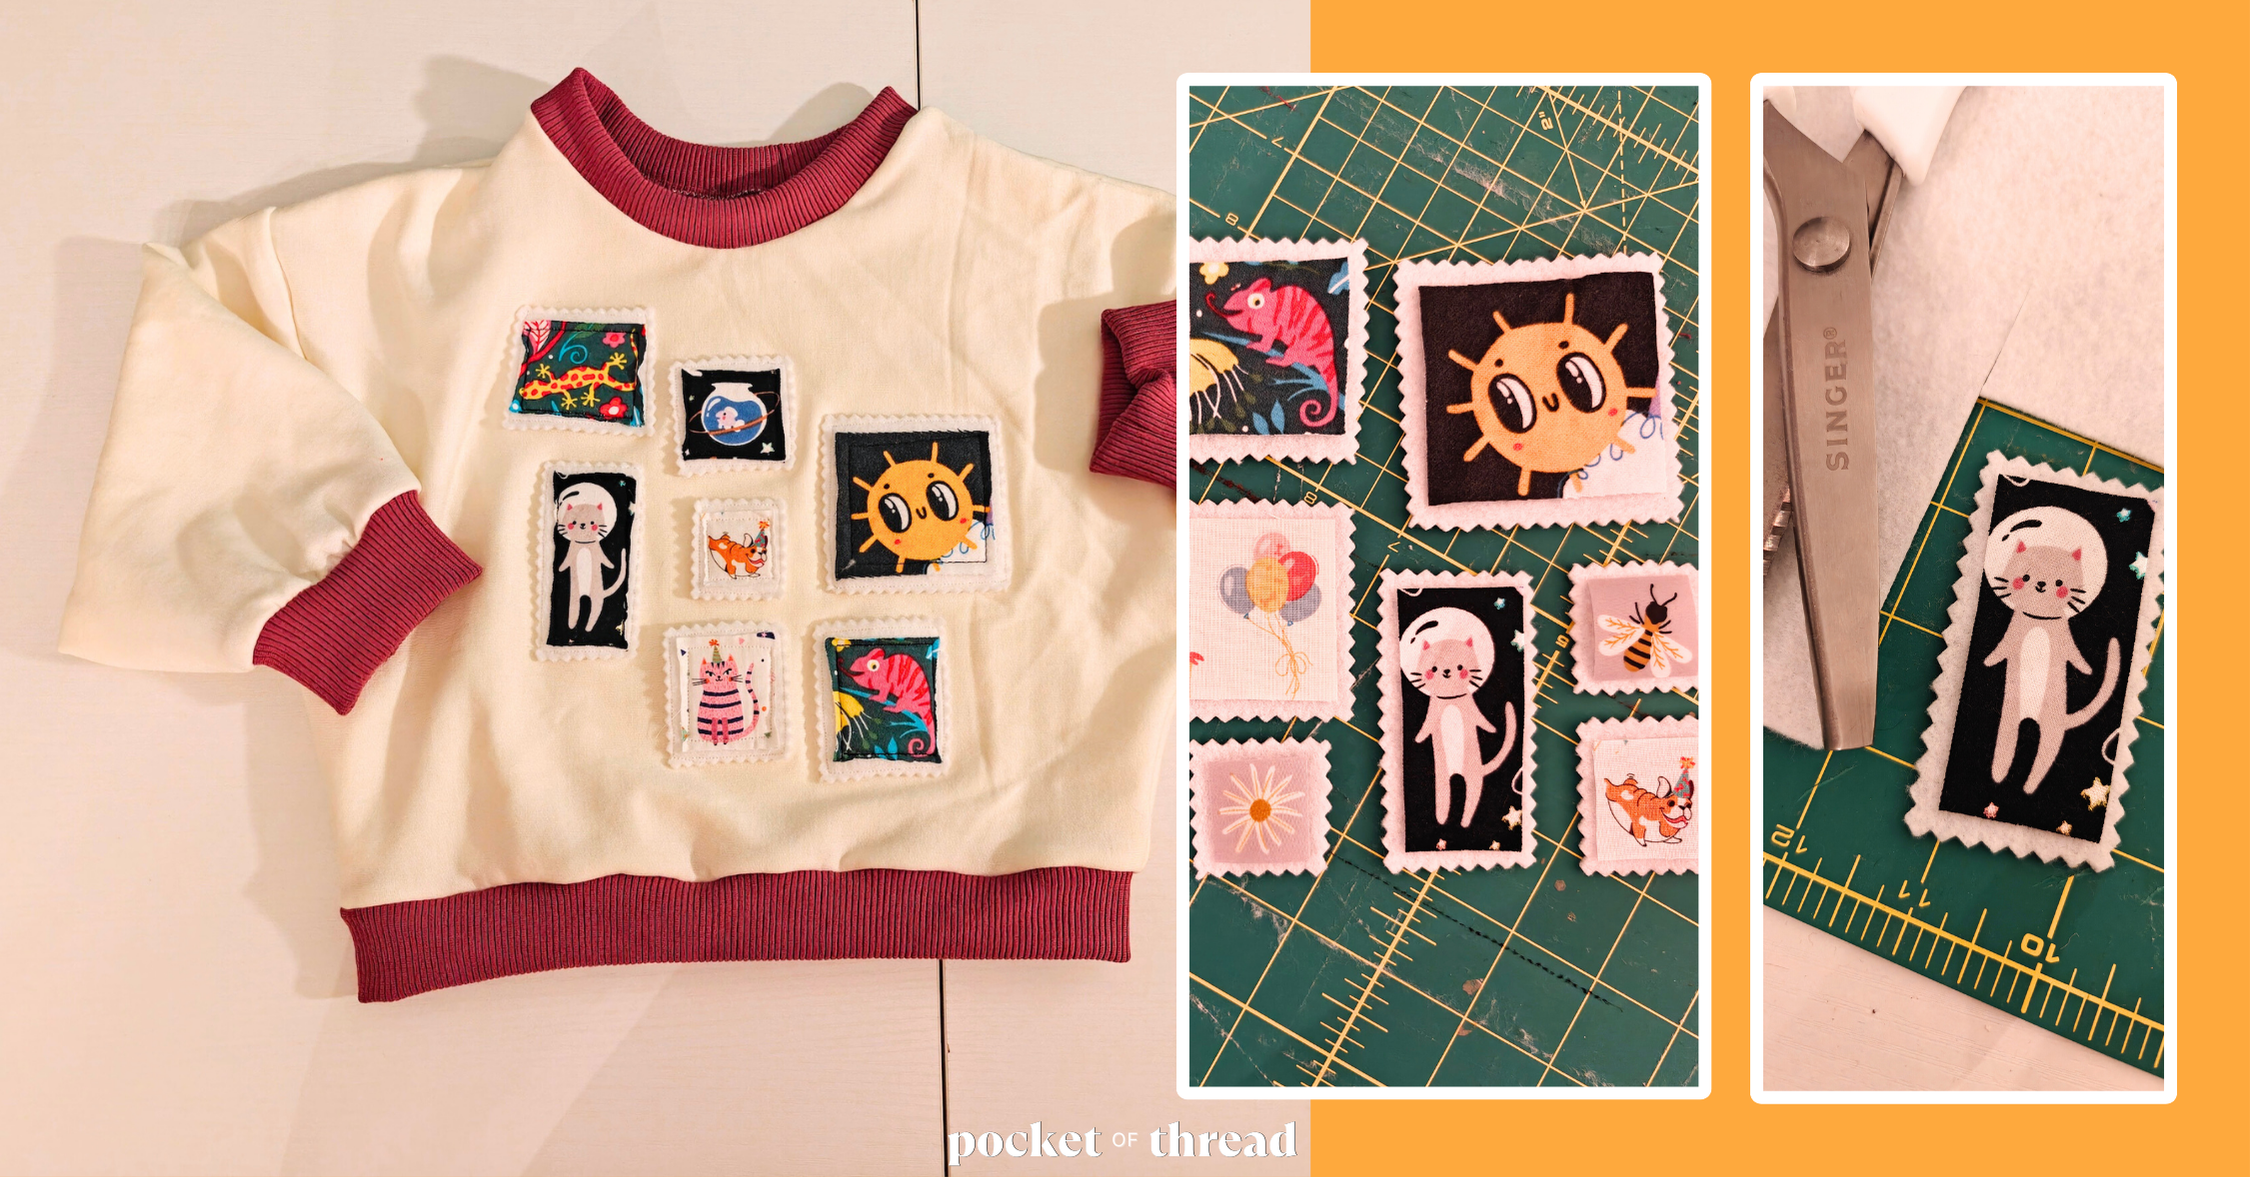
Today I have a super simple, beginner-friendly tutorial to share: fabric stamp appliques! An applique is basically just a decorative patch and can be made in any shape or size to fit your project. For this project, I wanted to make my appliques look like little postage stamps to showcase some of the cute prints in my fabric scraps. If you’ve been wondering how to use some of your tiny fabric scraps, this project is for you!
Materials Needed:
- 1 sheet of white felt (or other white fabric)
- Coordinating thread
- Fabric scraps (ideally with graphics and fun prints)
- A quilting square/ruler
Cut out your fabric
I went through my bag of fabric scraps from past projects and found all sorts of little characters and prints that I wanted to cut out. I used a ruler to get the edges nice and straight and made sure to leave a tiny margin around the prints for sewing later.

Cut out your felt
Lay your fabric cut-out on top of your felt and carefully cut out a piece that’s ~1/4 inch larger on each side with your pinking shears. This detail will give it that “stamp” look. Repeat for all of your pieces!
If you don’t have felt, you can also use any white fabric, like cotton, flannel, or jersey. I just liked the 3D effect that the felt had plus I already had some on-hand. (This is the pack that I have.)
Using a glue stick or spray adhesive, glue the fabric down to your felt. This will make it MUCH easier to sew them onto your project later.


Applying the appliques to your project
Create your layout and pin the stamps down
I found this adorable pattern for a baby sweatshirt and knew that’s what I wanted to put my fabric stamps on. After I cut out the pattern pieces from my fabric, I started arranging the stamps into the layout that I wanted. Then I pinned everything down really well so they wouldn’t shift as I sewed them on.


Sew just inside the fabric border
Stitch down each stamp by sewing just inside the perimeter of the printed fabric. After I stitched down all of my stamps, I noticed that the stamps were sort of lifting up more than I really wanted on the edges so I went around again and stitched the felt down as well (using a white thread). This really helped the stamp patches lay flat and make it so I wasn’t worried about them ripping off in the wash.
As you can see from the close-ups, some of the fabric edges are slightly frayed which I actually like and think it adds the homemade look I’m going for. If you don’t want this, you could either only use non-fraying fabrics (jersey, flannel, etc) or use a serger/zigzag stitch when sewing the fabric onto the felt to encapsulate the raw edges.


Final Reveal!


Not only did the fabric stamps turn out so cute, but I’m in love with this sweatshirt pattern too! It has this slouchy fit that is so adorable and the baggy arms make it easy to get on a wiggly toddler. These stamps would also be super cute on a tote bag or a hat too!
(Disclaimer: As a member of the Amazon Affiliate Program, I may earn a commission from qualifying purchases linked on this site.)
